

As you are now aware, I have a music library which is now set up by using Plex and PlexAmp. I put a lot of work into it (and still doing so today and everyday) to a big, lovingly-curated music library in Plex. But I did not really enjoy the playlists (and mixes) that PlexAmp built. I want playlists that actually sound alike — regardless of genre or language — so I wanted to try out AudioMuse-AI, having heard so much about it on the internet..
This is the honest, full story of how I set up AudioMuse-AI for Plex on my own library of nearly 4,000 albums: what it is, why I ditched my Synology NAS for a MacBook Air, every mishap along the way (including running out of disk space mid-analysis), how long it really took, and the clustering settings that finally gave me the goods.
Fair warning: this took me about 5.6 days end to end. Not because AudioMuse is hard — the actual clicking is easy — but because I insisted on learning the hard way.
Hopefully this post saves you a few of my bruises 😬
Table of Contents
What Is AudioMuse-AI for Plex (and How Is It Different From PlexAmp’s Sonic Analysis)?
AudioMuse-AI is a self-hosted app that analyses the actual audio of every track in your library and builds a “sonic fingerprint” for each song. It then uses those fingerprints to generate playlists of songs that genuinely sound close to each other — similar energy, mood, tempo, texture — and pushes those playlists straight back into your music server.
Now, if you use PlexAmp you’re probably thinking: doesn’t PlexAmp already do Sonic Analysis? Yes and no. PlexAmp’s Sonic Analysis is a closed, Plex-controlled feature — it powers things like Sonic Adventure and “similar tracks,” but you don’t own the model, you can’t tune it, and you can’t see or shape how the groupings are made. It’s a black box that works nicely but on Plex’s terms. And we know how Plex has been treating its users recently 🤷
AudioMuse-AI is the opposite philosophy. It’s open, self-hosted, and yours. You run the analysis on your own hardware, the embeddings live in your own database, and — crucially — you get to control the clustering: how many playlists, how tight or loose the grouping, how much it prioritises diversity versus purity. It’s for people who want to get under the hood, not just press a magic button. If you’re the kind of person who self-hosts Jellyfin and organises FLACs by hand, you already know which camp you’re in (or rather I am just talking about myself lah 😀).
Unfortunately, up to recent it, AudioMuse-Al did not support Plex. And I nearly wanted to move to Navidrome because of that single reason…. 😝
The killer feature, for me, is that it clusters by sound, not by tags. More on why that mattered later — but spoiler: it happily throws Adele, Cantopop, Mandopop and K-pop into the same playlist when they feel alike, which is something no genre-tag system could ever do.
AudioMuse-AI Now Supports Plex (This Is New)
Here’s the thing that made me jump on this: native Plex support is recent. AudioMuse-AI started out supporting servers like Jellyfin and Navidrome, and Plex users were left out for a while. That changed with version 2.5.0, which added Plex Music Server support directly. Read about that in Reddit. And you can see it on that Github page now !
So if you last looked at AudioMuse-AI and thought “shame, no Plex,” look again. As long as you grab a current release (well past 2.5.0), Plex is a first-class option in the setup wizard — you point it at your Plex server, drop in your token, and it pulls your library over the network. That single update is what turned this from “not for me” into “let’s go.”
But it is always not so smooth sailing (for me.. 100% my fault) when I have to set up AudioMuse-AI for Plex.
Attempt #1: Docker Compose on My Synology DS1520+
My first instinct — like any self-hoster — was: this belongs on the NAS. My Synology DS1520+ runs my Docker stuff, it’s always on, it’s where my media lives. Obvious home, right?
AudioMuse-AI ships a Docker Compose setup with four services: a Redis queue, a PostgreSQL database, the Flask web app, and an RQ worker that does the heavy lifting.
So I set up my Docker Compose file (the Github gives a docker-compose file and environment variables to set up). Here’s my Docker Compose file in Dockhand (Yes I have moved from Portainer to Dockhand and you should too.. damn good Sia !).
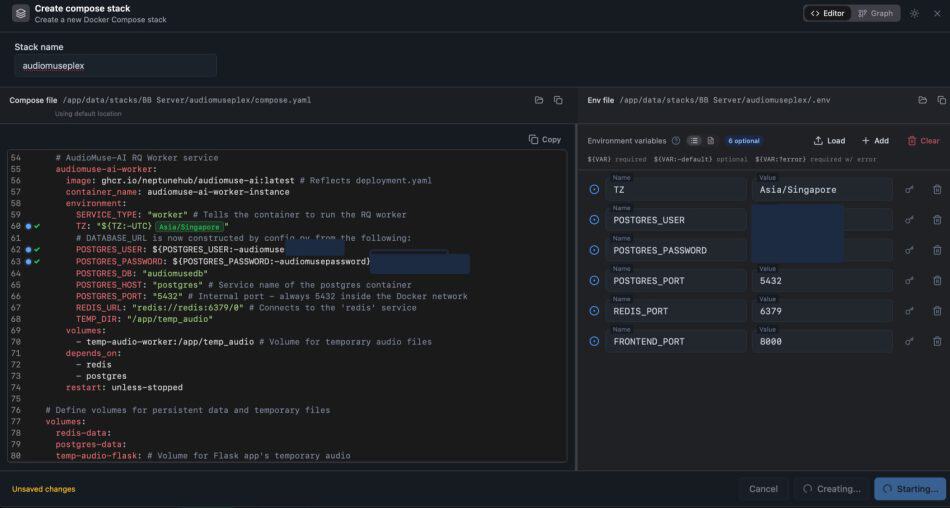
All good. Once I kicked off the creation of the docker containers (with the docker images) in Dockhand, the docker containers (quite a few of them !) are up and running…
But look at the CPU usage of the AI flask and AI worker containers !
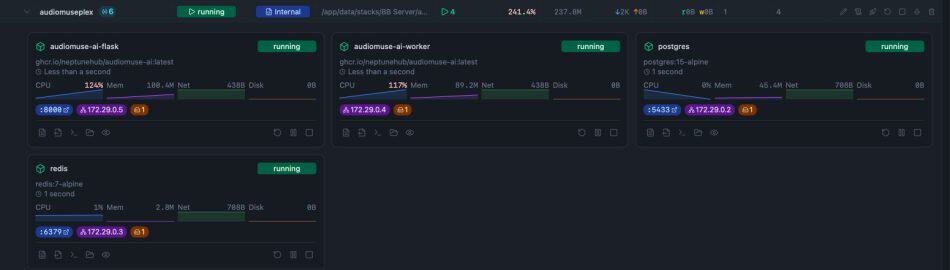
But, okay. Let’s ignore that red flag for now….. once it is up and running, you go to the URL (e.g. my case it will be my home server with port 8000)… you can then find the choice of PLEX for the first time in the drop-down menu. Then you need to set up the URL of your Plex server.
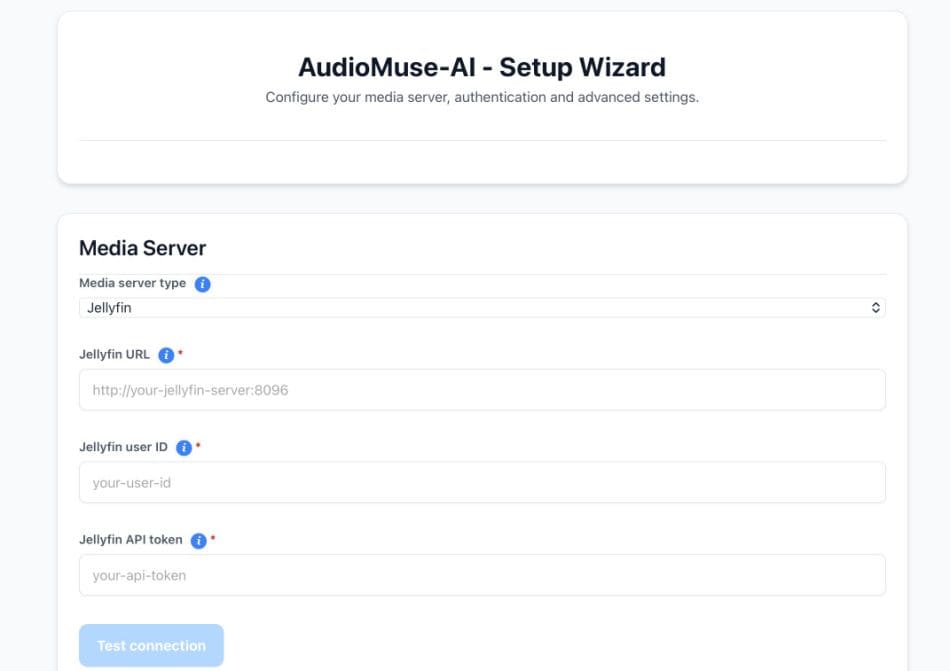
Specifically you need to provide the Plex URL and the Plex API token (which you can get from YOUR PLEX LIBRARY as per this guide).
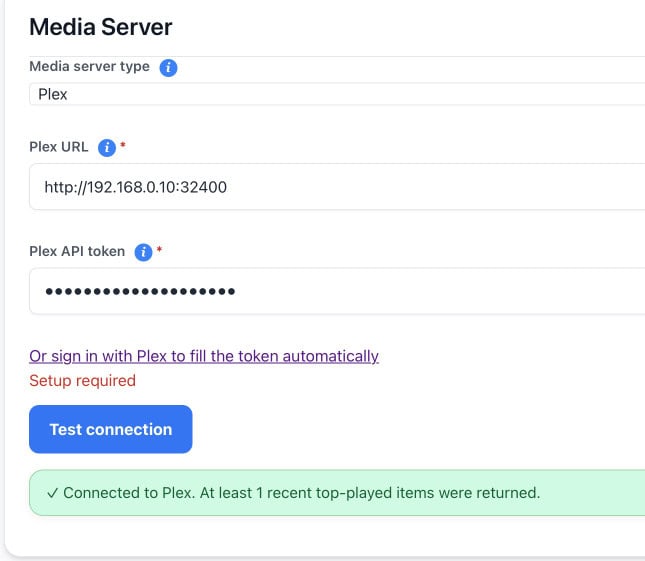
Click on TEST CONNECTION and you should set the GREEN COLOUR success message.
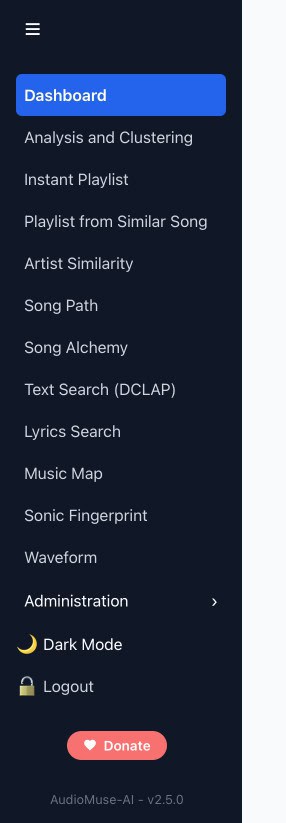
Then you can go to the SIDEBAR to choose “ANALYSIS AND CLUSTERING”. This is the first few steps to get AudioMuse-Al to recognise your music 🎵.
There are a whole series of settings to play with…. but I just choose the default (big mistake) and then click on the “START ANALYSIS” button.
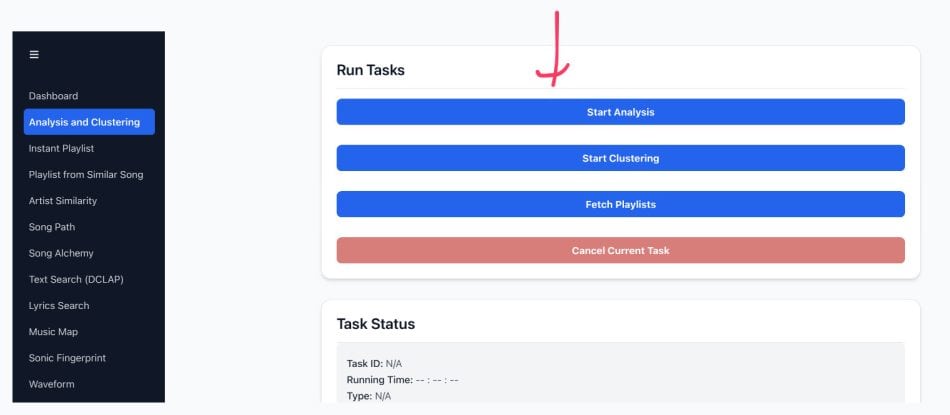
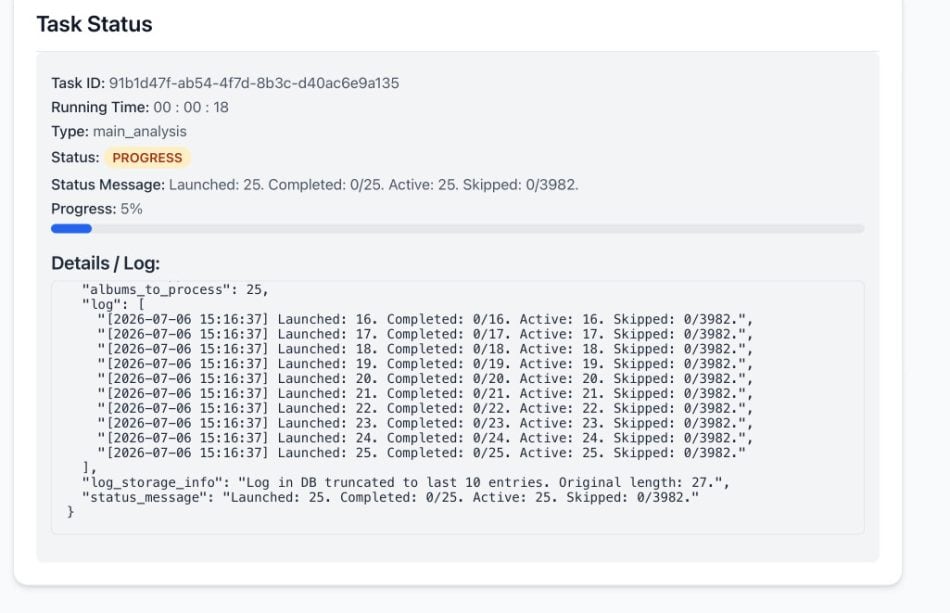
And off it goes 🙃
And almost instantly, the CPU usage on the Synology went up to 100%. Okay lah.. 99%, can 😂…..
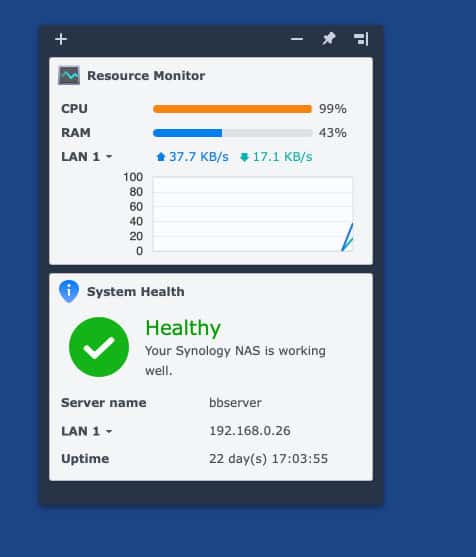
My Failed Attempt of AudioMuse-Al for Plex on a Synology NAS
I set it up on the Synology and even did some optimising up front, because on my first tiny test it was crawling:
- I set
CLAP_ENABLED: "false"on both the Flask app and the worker. CLAP is a heavier text-embedding model, and turning it off is the documented way to speed up analysis when you just want the core sonic fingerprints.

- I gave the worker
cpu_shares: 512so it would yield CPU politely if the NAS got busy with other things.
And it… ran. For about 20 albums. You can see the statistics in the dashboard very quickly….
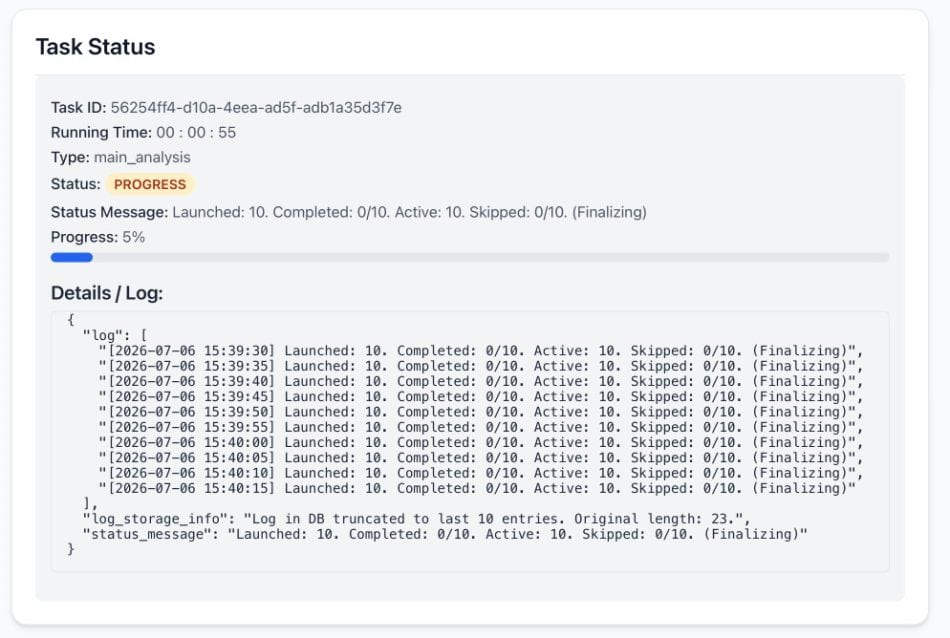
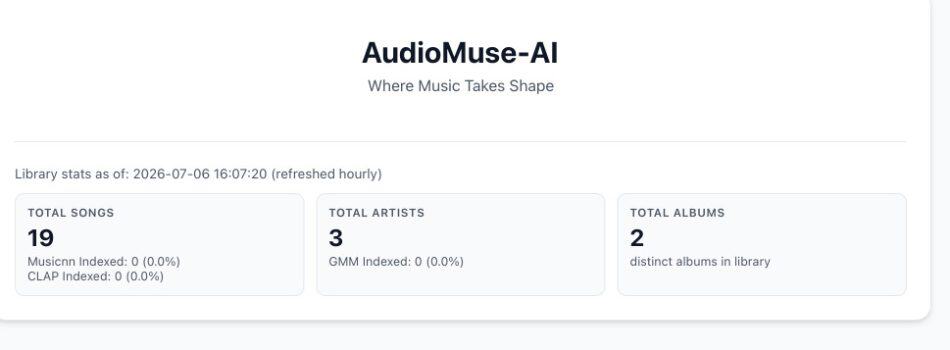
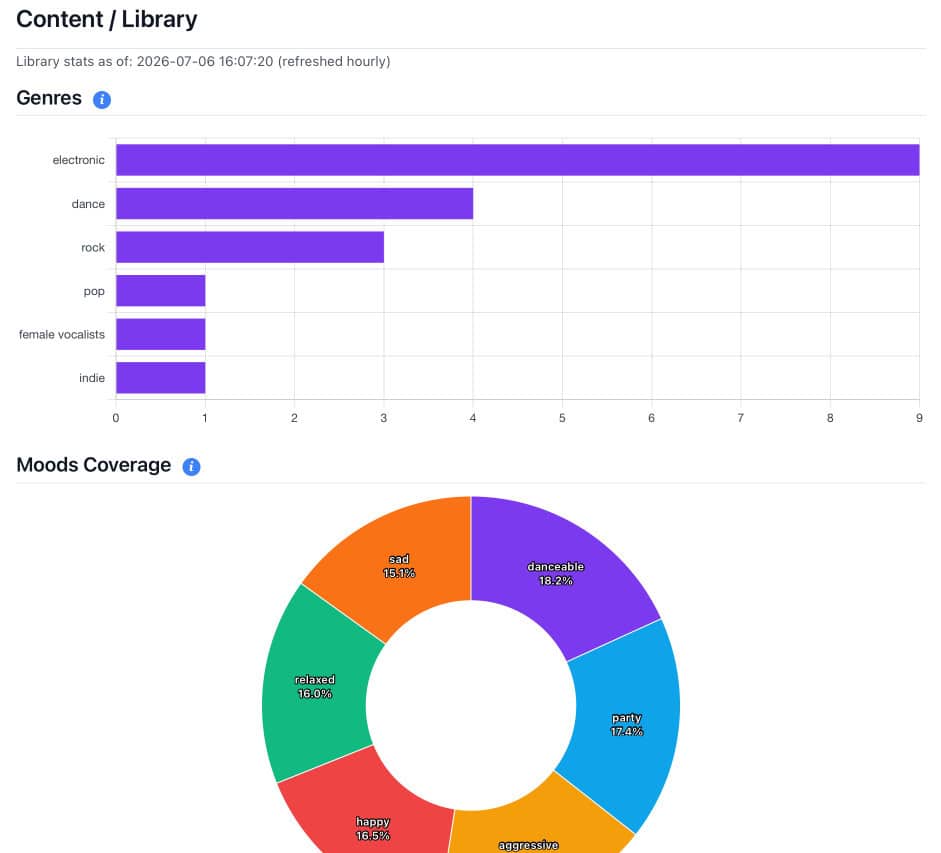
Then the whole NAS shut itself off.
Not the container crashing. The entire box powering down. When I checked Synology’s Log Center, there it was in black and white:
“The system has detected that the temperature of bbserver is too high… Your system will shut down automatically to protect the hardware components if the temperature continues to rise.”
A thermal shutdown. Two things conspired here. First, the DS1520+ uses an Intel Celeron J4125, which — and this is the important bit — has no AVX instruction set. The machine-learning inference that AudioMuse does leans on AVX for speed; without it, the CPU falls back to a much slower path and works flat-out for every single track. Second, I live in Singapore. Sustained 100% CPU on a fanless-ish NAS in a room that’s 30°C+ ambient is a recipe for cooking the thing. The analysis was so CPU-heavy, for so long, that the box overheated and hit its self-protection cutoff.
This Synology shutdown is not specific to AudioMuse-AI
To be fair to AudioMuse-Al, it is not the software. It is definitely the hardware. How the world I know. Cause Plex will also crash my DS1520+ if I allow Sonic Analysis to run at the same time when I add new music (especially a whole discography at once). So I always have these two settings in Plex.

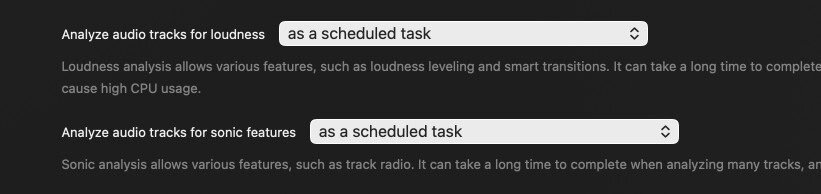
Lesson learned: the DS1520+ (and most Celeron-based Synology “plus” units) is the wrong machine for this job. No AVX means slow; Singapore heat means hot; the two together mean shutdowns. If your NAS has a modern CPU with AVX2 and good cooling, your mileage may vary — but mine simply couldn’t take it.
Attempt #2: Running AudioMuse-AI on My MacBook Air M2 (The Win)
The fix was obvious once I stopped being stubborn: move the analysis off the NAS and onto a machine that’s actually built for this — my MacBook Air M2 (2023, 16GB). Well, almost lah. If you have those solid Windows Desktop built for gaming kind of machines, then you are so going to be rocking the whole set up.
Why the Mac is the better choice:
- Apple Silicon has NEON — the ARM equivalent of the AVX my NAS lacked. So the inference runs several times faster per track, and it doesn’t fall off a cliff the way the Celeron did.
- It doesn’t thermally self-destruct doing it. A fanless Air might throttle a touch under sustained load, but even throttled it buries the J4125, and it won’t power itself off.
- No Docker needed. AudioMuse-AI ships a native macOS app that bundles the entire stack — PostgreSQL, Redis, the web UI and the workers — all inside one app. No Compose file, no external database, nothing to wire up.
Here’s the exact setup I used.
Prerequisites
- An Apple Silicon Mac (M1/M2/M3/M4) — the native build is ARM-only.
- macOS 15 (Sequoia) or later. (I was on Tahoe 26, newer than they’d tested against, and it worked fine.)
- Your Plex server details and a Plex token.
Step 1: Download the Right Build
Go to the AudioMuse-AI GitHub releases page and grab the macOS Apple Silicon asset — the file is named AudioMuse-AI-arm64.zip. Get the latest release so Plex support (2.5.0+) is baked in. Don’t grab a Linux or Intel build by mistake.

Step 2: Install and Clear the Quarantine Flag
Unzip it, drag AudioMuse-AI.app into your /Applications folder. The app is unsigned (the dev hasn’t paid Apple’s notarisation fee), so macOS will block it on first launch. Clear the quarantine flag from Terminal:
xattr -dr com.apple.quarantine /Applications/AudioMuse-AI.app
That one line just tells macOS “I trust this,” stripping the “downloaded from the internet” tag. If you’d rather not touch Terminal, you can instead double-click, dismiss the warning, then go to System Settings → Privacy & Security → Open Anyway. Same result.
Step 3: Launch and Find It in the Menu Bar
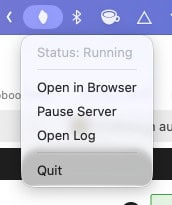
Open the app from /Applications. One quirk to know: the icon lands in your menu bar (top-right), not the Dock. It starts its bundled services and opens the web UI in your browser at http://127.0.0.1:8000. Quitting from the menu bar shuts the whole stack down cleanly — which is exactly what you want between runs.
Step 4: Point the Setup Wizard at Plex
On first launch a Setup Wizard appears. Choose Plex, enter your Plex server address and token, and it’ll pull your library over the network. This is the step that only became possible with 2.5.0, so make sure you’re current. It is similar to set the set up I showed you above for Synology. This time you are on a MacBook Air (or whatever desktop you have).
A Small Detour: I Locked Myself Out
Worth flagging because it’ll happen to someone: during setup I set an AudioMuse login password and promptly forgot it. There’s no “forgot password” button, but the fix is painless because I hadn’t run the big analysis yet — everything AudioMuse stores lives in one folder, so I just quit the app and renamed the data folder to force a fresh start:
mv ~/Library/AudioMuse-AI ~/Library/AudioMuse-AI.old
Relaunch, and the Setup Wizard reappears from scratch. This time I choose no authentication to make life easier. And honestly YOU DONT NEED AUTHENTICATION lah. It is running on your machine.
The Analysis Run: 5.6 Days and Every Mishap Along the Way
Now the main event. Analysis is the one-time, per-song crunch: it downloads each track from Plex, runs it through the model, and saves a tiny fingerprint vector to the database. My library was 3,986 albums — roughly 44,571 tracks.
I’d love to tell you it went smoothly. It did not. Here’s the honest timeline.
It’s Slow — Like, Really Slow
Even on the M2, this is a marathon. My rough pace settled around 27–28 albums an hour, though it swung a lot depending on album size — a run of short K-pop EPs would fly, then a fat Elton John box set would drag it right back down. Early on I naively hoped for “a few hours.” Reality: think days, not hours. And that’s normal — AudioMuse itself warns that big libraries or slower setups can take a week or more.
One thing that kept me sane: it’s fully resumable. Every completed album is banked immediately. Interrupt it, and on restart it simply skips what’s done and carries on. That property turned out to be a lifesaver, because…
The Disk Ran Out at 67%
About two and a half days in, cruising past the two-thirds mark, the whole thing fell over. The log filled with the same two errors, thousands of times:
OSError: [Errno 28] No space left on device: '.../temp_audio/xxxxx.flac'psycopg2.errors.DiskFull: could not extend file … No space left on device
I’d run out of hard disk space. Here’s the subtle trap: AudioMuse itself was innocent — its whole footprint was under 400MB. The problem was my MacBook’s SSD was already nearly full from other stuff, and the analysis needed just a sliver more scratch space than was left. When df showed only a few hundred megabytes free, every new track download and every database write started failing.
The saving grace: because analysis is resumable, nothing already analysed was lost. The ~2,700 albums done so far sat safely in the database. I just needed to free space and restart.
SIGH. So much things happening…….. Or I like to say to my son.. “STRESS TO THE MAX”…

The Great Disk Hunt
This part got genuinely confusing, and it’s worth knowing about because macOS makes it murky. My System Settings said I had 173GB free, but the terminal (df) insisted I had almost nothing. Both were “true” — macOS counts purgeablespace (caches, snapshots, staged updates) as available even though an app can’t reliably use it in the moment.
I cleared 40GB of old videos, emptied the Trash, and restarted the analysis. It picked up right where it left off — the log proudly showing Skipped: 2,460 as it flew past everything already done. But the free space kept mysteriously droppingover the next day.
The real culprit, discovered after much digging: a stuck macOS update. (like what the hell, here I am doing serious work and suddenly there is a macOS Tahoe update to install ? Buy 4D also not so “heng”…)
There was a staged system update sitting in a local APFS snapshot, quietly hoarding around 260GB of disk that didn’t show up in normal scans. Once I actually let that update install, the machine rebooted and my free space jumped from ~5GB to 253GB. That had been the invisible hand squeezing the disk the entire time. (I’ll spare you the full update drama — the point is: if your Mac’s free space makes no sense, check for a pending update and check your local snapshots with tmutil listlocalsnapshots /.)
And then the analysis continues…
The Final Analysis Time
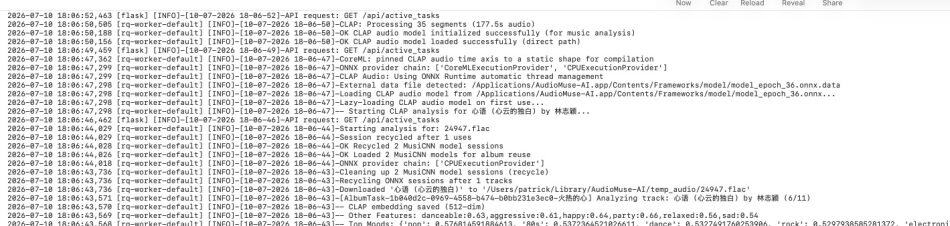
So what did it actually take? Being fully honest, warts and all: around 135 hours of wall-clock — roughly 5.6 days — end to end, across the crash, the restart, and the disk detective work. The clean final resumed run alone was about 50 hours. And the result that matters:
Main analysis complete. Launched 1526, Skipped 2460, Failed 0.
Every one of the 3,986 albums analysed. Zero failures. Five days, one NAS thermal shutdown, one forgotten password, one disk-full crash, and one 260GB phantom update later — the whole library was fingerprinted.
That means AudioMuse-AI knows (I guess supposedly knows well) my whole MUSIC LIBRARY. COOOLLLL, right?
But we are not done lah.. know is know.. how to make it work is a different story lah….
The Clustering Settings (and Why They Matter)
Analysis builds the map. Clustering is what turns that map into actual playlists — it groups the fingerprints into clusters of similar-sounding songs and exports them to Plex. And here’s where the settings genuinely matter, especially for a library like mine that sits below the 50,000–100,000 tracks the defaults assume.
After some back-and-forth, here’s the configuration that worked, and the reasoning:
- Use Embeddings for Clustering: ON. Non-negotiable. This is what makes it cluster on the sonic fingerprintsrather than on ID3 genre tags. Turn this off and the five-day analysis was pointless.
- Stratified Sampling Target Percentile: 100. The default (50) clusters on roughly half your library as a sample. For a sub-50k collection you want the whole thing considered, so crank this to 100. This was the single most impactful setting.
- Min Songs Per Genre for Stratification: 50 (down from 100). My library has real depth in some areas but thinner pockets in others (a handful of Chinese artists, assorted K-pop). Lowering this lets those smaller pockets still get represented.
- Min Clusters: 8 / Max Clusters: 20. The default was 40/100, which would shatter the library into loads of thin slices. For a first, judgeable run you want fewer, larger, well-populated clusters. You can always go more granular later.
- TOP Playlist Number: 8. How many of the resulting clusters actually get exported as named playlists. Eight is a sane number to audition.
- Clustering Runs: 300. This is an evolutionary search — it tries many configurations and keeps the best-scoring one. I originally ran 1,000, but the best score locked in by around run 100 and never improved, so 300 gets the identical result in a fraction of the time. No point running 1,000 if it converges early.
- Diversity Score Weight: 2 / Purity Score Weight: 1. Left at defaults — a reasonable balance of “clusters are distinct from each other” versus “clusters are internally coherent.”
Everything else (Max Distance, PCA range, the other score weights) I left at defaults. Don’t fiddle with knobs you can’t yet judge the effect of.
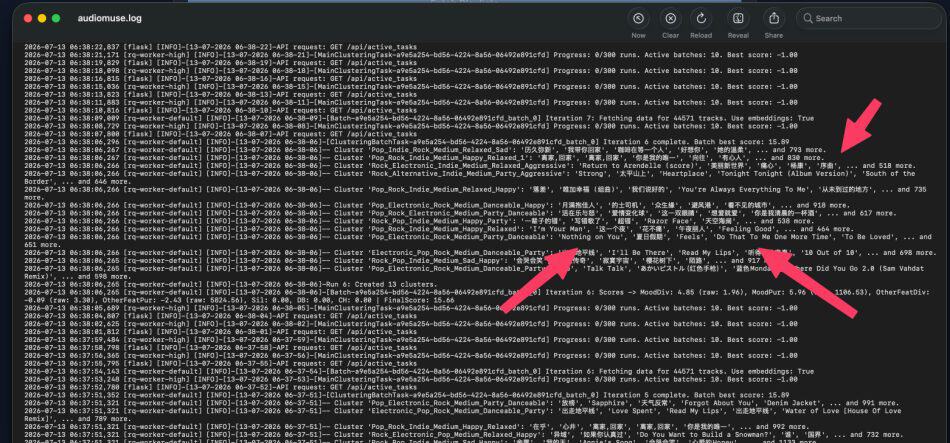
One thing if you see the Logs from the menu bar (AudioMuse-AI > open log). It is quite interesting.. You can see the Clustering of Both Ang Mo Music and Chinese Pop together…. even though different genres (or languages) but they are clustered together as supposedly they are going to sound good together.
The Final Clustering Time
With analysis done and the disk finally healthy, clustering was a sprint compared to the marathon — it works on vectors already in the database, so there’s no audio downloading involved. My final successful run of 300 clustering runs took about 1 hour 15 minutes, landing on a best score of ~15.9, settling on 18 internal clusters, and exporting the top 8 as playlists.
So quite fast.. HA HA.. Compared to the damn analysis..
The Whole Point: The Playlists
This is why we do all of it. Suddenly my PlexAmp has many new playlists. You can see a whole row of new playlists in the second row. That’s the playlist generated by AudioMuse-Al based on the sonic analysis of the songs in my library and the clustering together.
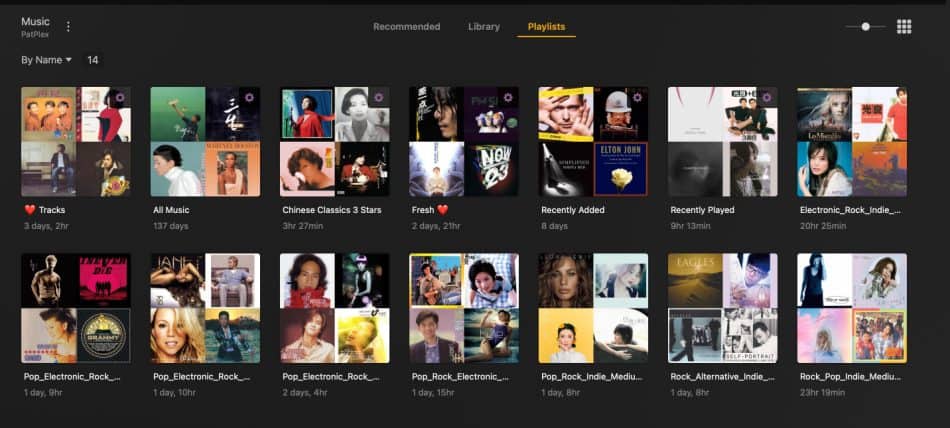
Here’s what AudioMuse-AI generated and pushed into PlexAmp:
- Electronic_Rock_Indie_Medium_Relaxed_Aggressive — 442 songs
- Pop_Electronic_Rock_Medium_Danceable_Party — 531 songs
- Pop_Electronic_Rock_Medium_Party_Danceable — 557 songs
- Pop_Electronic_Rock_Medium_Relaxed_Happy — 761 songs
- Pop_Rock_Electronic_Medium_Party_Danceable — 585 songs
- Pop_Rock_Indie_Medium_Relaxed_Happy — 479 songs
- Rock_Alternative_Indie_Medium_Party_Aggressive — 492 songs
- Rock_Pop_Indie_Medium_Happy_Relaxed — 412 songs
Look at those names. They’re not genre tags from my files — they’re sonic descriptions the tool derived from the audio itself: genre blend, tempo, and mood. And every playlist is properly populated (400–760 tracks each), not thin fragments.
But here’s the genuinely magic part, the thing I couldn’t do by hand in a million years: it groups by sound across languages. Inside a single cluster I found Adele’s “Cold Shoulder” sitting next to Mandopop, an English pop track flowing into a Cantonese one, K-pop mixed with Western indie — all because they feel alike in energy and mood, even though a genre-and-language tag system would keep them in completely separate boxes.
That is exactly what PlexAmp’s closed Sonic Analysis can’t give you the control to do, and it’s the whole reason the five-day slog was worth it. Or so, I hope….
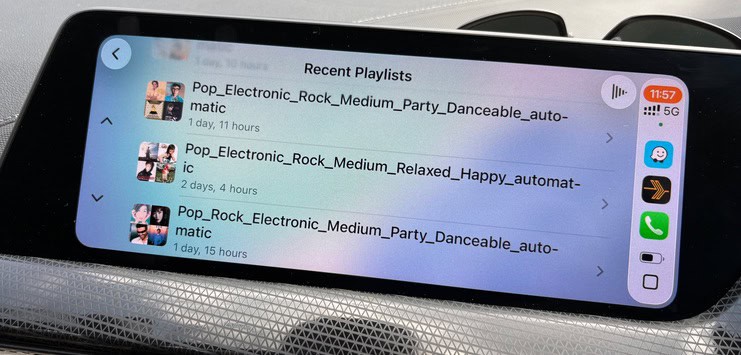
And oh. This is how it looks on CarPlay too.
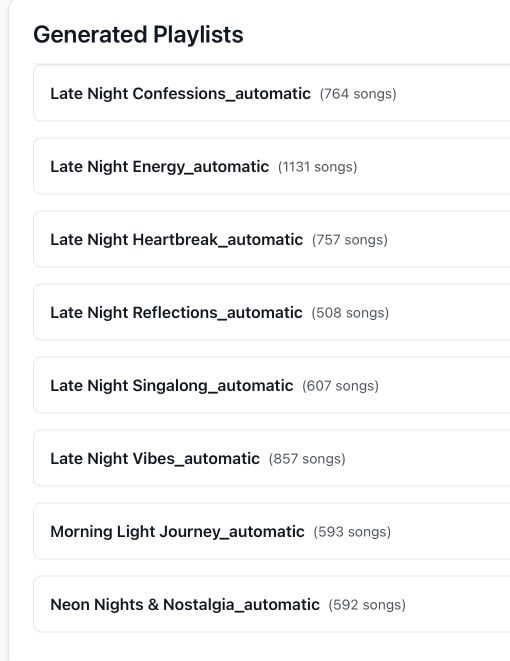
If you dont like the names of the generated playlists, you can add an AI Provider to change it…
For example, I use OpenRouter to do so..
AI_MODEL_PROVIDER   = OPENAI
OPENAI_SERVER_URL   = https://openrouter.ai/api/v1/chat/completions
OPENAI_API_KEY      = sk-or-...        (your OpenRouter key)
OPENAI_MODEL_NAME   = anthropic/claude-haiku-4.5
Then when you re-run the Clustering, MusicMuse-Al will do the following 😊
Sending prompt to AI (OPENAI): You are an expert music collector and MUST give a title to this playlist. The title MUST represent the mood and the activity of when you are listening to the playlist. The title MUST use ONLY standard ASCII (a-z, A-Z, 0-9, spaces, and - & ' ! . , ? ( ) [ ]). The title MUST be within the range of 5 to 40 characters long. No special fonts or emojis. * BAD EXAMPLES: 'Ambient Electronic Space - Electric Soundscapes - Emotional Waves' (Too long/descriptive) * BAD EXAMPLES: 'Blues Rock Fast Tracks' (Too direct/literal, not evocative enough) * BAD EXAMPLES: '\U0001D5DD\U0001D5C2\U0001D5C8 \U0001D5C2\U0001D5CB\U0001D5C8\U0001D5C7\U0001D5C2 \U0001D5C9\U0001D5CB\U0001D5C8\U0001D5C7\U0001D5C2' (Non-standard characters) CRITICAL: Your response MUST be ONLY the single playlist name. No explanations, no 'Playlist Name:', no numbering, no extra text or formatting whatsoever. Then now I get a list of playlists but then names are pretty similar .. 🤔 AI must know I am a late night owl ? 🙃
Maintaining AudioMuse-AI Going Forward (When You Add New Albums)
Here’s the good news that makes the painful first run a one-time cost: you never have to do the full crunch again.
The native app keeps its database on your Mac, and all ~44,000 fingerprints live there permanently (and that always means, the Virgo in me, will say, “HOW CAN I BACKUP THESE as I WONT WANT TO DO IT ALL AGAIN”….. something like this….)
cp -R ~/Library/AudioMuse-AI ~/Desktop/AudioMuse-AI-backup-2026-07-13So when you add new music, the workflow is quick:
- Open the AudioMuse-AI app (menu bar) on the MacBook.
- Run Analysis again — it skips everything already fingerprinted and only processes the new tracks. Add one album, it analyses one album’s worth. Minutes, not days.
- Run Clustering again — this one’s fast regardless (it’s just vector maths), and it re-groups everything including the new material. Because clustering has an element of randomness, re-running also naturally freshens your playlists.
- It re-exports the playlists to Plex, and PlexAmp updates.
- Quit from the menu bar; the Mac and NAS both go back to idle.
One important note on “freshness”: AudioMuse doesn’t secretly rewrite your playlists in the background. A playlist only changes when you re-run clustering. So freshness is something you trigger deliberately, not something that happens to you — which, honestly, I prefer.
Given how I collect (full discographies in bursts every few weeks), firing this up occasionally after a collecting spree is a couple of minutes of babysitting, tops.
If you’d rather it run truly hands-off on a schedule, AudioMuse does have a cron/scheduling feature — but it only fires while an instance is actually running, so on a laptop that means “while the app happens to be open.” For a set-it-and-forget-it setup you’d want an always-on instance somewhere… which loops right back to the NAS-versus-cooler-hardware trade-off that started this whole saga.
For me, manual re-runs are the simpler and better fit. Never mind a little trouble… too much automation creates too much room for error for me …..
Other AudioMuse-AI features to discover
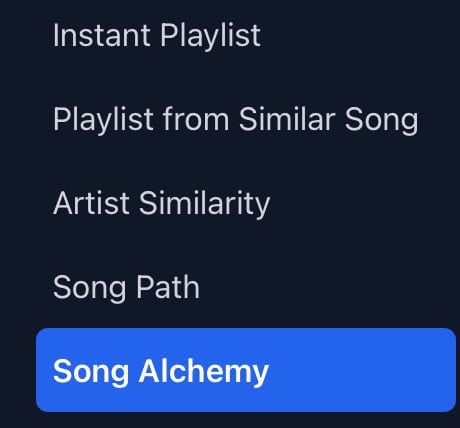
Once analysis is completed, and besides the clustering above to form 8 playlists, there are also other features that I need to explore in AudioMuse. Like the Instant Playlist based on a single track etc.
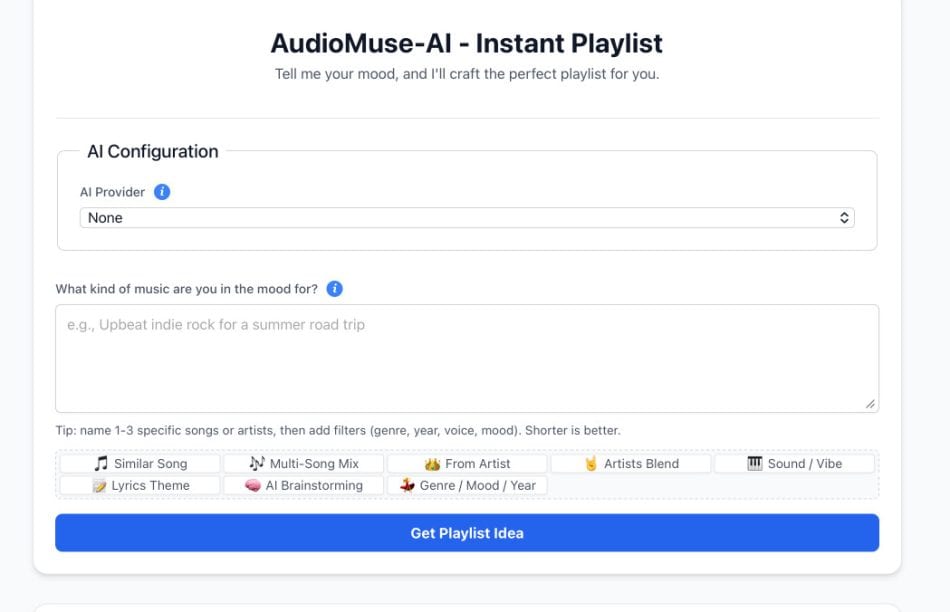
And many other ways of finding songs… really need to find time to know more… but the whole idea is AudioMuse-AI knows your music now… and it can help you find more music…..
Wrapping Up
Was setting up AudioMuse-AI for Plex worth five and a half days of grief? For a library I’ve spent years curating — absolutely. The clicking is genuinely easy; it was my own stubbornness (NAS in a hot room) and my own messy disk (a phantom macOS update) that turned it into an epic. Learn from my bruises:
- Run the analysis on an Apple Silicon Mac, not a Celeron NAS.
- Free up real disk space first — and if your free space makes no sense, hunt down pending updates and local snapshots.
- Be patient — a big library takes days, and that’s normal. It’s resumable, so let it grind.
- Get the clustering settings right for your library size (embeddings on, sampling at 100, sensible cluster counts).
And then enjoy the payoff: playlists that finally understand your music the way your ears do — across every genre and every language in your collection.


Hello,
Thank you very much for the detailed description of your process. I have a similar goal: setting up AudioMuse AI for Navidrome, but I plan to use it as a plugin for generating song radios on the fly.
My plan was also to install AudioMuse on my Synology NAS (920+).
After reading your article, I’m wondering whether that is the right approach. Do you have any experience using a MacBook as the analysis machine and then transferring the database to the NAS? Is that possible?
Thanks again for the article and your input.
Have a good day,
Lucas
Hello. I am using the MacBook as the analysis machine but I did not transfer the database to the NAS. It was not necessary as on the MacBook, AudioMuse will automatically create the playlists in Plex (for your case, that would be Navidrome, I guess). The end goal of AudioMuse AI is just to create playlists in our “client system” (Plex in my case) so I dont see the need to “transfer” the database. But I read that it is possible to do so through scheduled jobs.
920+ is not strong enough for Audiomuse-ai, I tried on DX4800 even after the initial job finished, the Docker instance is still consuming a lot of resources, causing the system to respond very slowly.
I use Plex too, but I switched my music library to Navidrome a long time ago and couldn’t be happier.