Amazon Lightsail is the new Amazon offering for VPS that individual web site owners can use for WordPress or other applications. I have described earlier in this blog post.
As with every new thing in IT, there is a learning curve. What used to be easy (or hard) in another environment (the shared hosting environment that I am used to) is different now in Amazon Lightsail.
There are many differences and I will try to share some of them here. One that I learnt these few days is the difference in the handling of htaccess file.
It is best described here:
By default, we disable .htaccess files for security and performance reasons. You can find more info in the link below:
https://wiki.bitnami.com/Components/Apache/htaccess_configurationWe include these files content into the htaccess.conf file. We place this file into /opt/bitnami/apps/wordpress/conf/
Previously we make all our changes in the htaccess file and then put that in the same directory as the one we are trying to make changes to. For example, we will usually place it in the same directory where the wordpress files such as wp-config or wp-login are.
Now the suggestion is to make them in a single file called “htaccess.conf” which is placed in /opt/bitnami/apps/wordpress/conf/ (for my case, that’s /home/bitnami/apps/wordpress/conf/). This directory is separate from the WordPress contents file (which is /home/bitnami/apps/wordpress/htdocs/).
So tonight, I wanted to make changes to the htaccess to protect the wp-login file for one of my client’s web site (not mine. Mine unimportant. No one cares. Ha).
That’s usually done by adding approved IP addresses to the htaccess and then deny everyone else in the world to it. I tried to do that in the htaccess file in the WordPress directory, thinking it will work. It did not.
So after doing some research (like the many ones I have to do since I moved to Amazon Lightsail)….
Use a tool like Cyberduck (in Mac) to access the files in the instance and of course the method will have to be at least be SFTP (with your bitnami password).
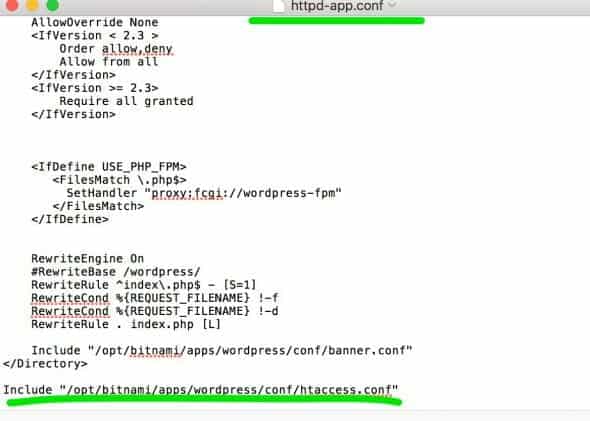
Step 1 : Make sure httpd-app.conf references htaccess.conf.
The /opt/bitnami/apps/wordpress/conf/httpd-app.conf file is the main application configuration file. It also sources the htaccess.conf file. So find the file (httpd-app.conf) in the /opt/bitnami/apps/wordpress/conf and then make sure that it “mentions” that file:

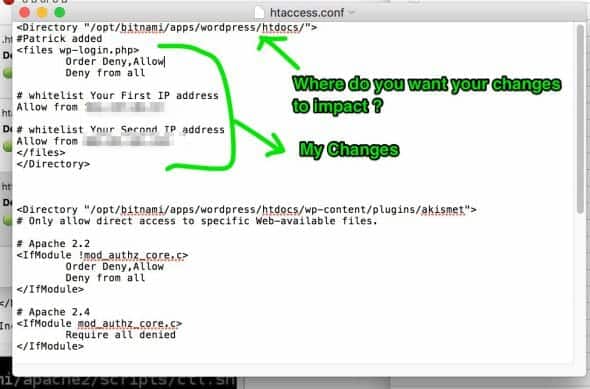
Step 2 : Go to the /opt/bitnami/apps/wordpress/conf/ folder again and now look for htaccess.conf file.

Step 3 : Edit the file contents with what you want to do. It is important you reference the directory in which you want this set of instructions to take effect in. Remember your instructions now sit in a file and a directory that are different than where you want to “impact” the instructions on. So WordPress now needs to know where to “impact” the changes. Hence the reference is important.

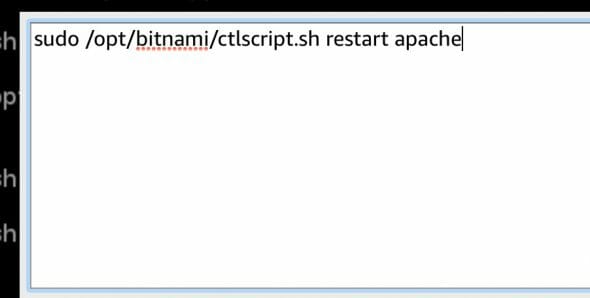
Step 4 : Save the file and RESTART APACHE with this command in your Amazon Lightsail Terminal:
sudo /opt/bitnami/ctlscript.sh restart apache

Test your changes. For my case..
Testing it in Wifi (which is my allowed IP address)

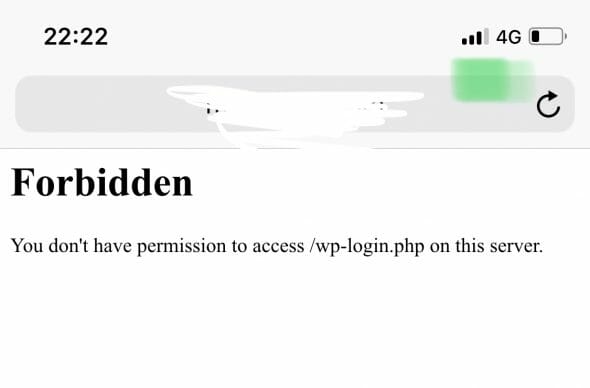
Testing it in 4G (which is not in my allowed IP address)

It works 🙂


