I have been using Amazon Lightsail for almost 2 years. And I used it for almost all of my own websites (and my clients’ websites). It is certainly not the cheapest in town but the fact there is no contract also means I just keep paying the basic prices for 2 years. I can also shut down and remove any web sites I want (this is especially so for the Singapore Property market).
For almost all my Amazon Lightsail instances, I have also used the Amazon Route 53 as my domain register and Domain Name Service (DNS).
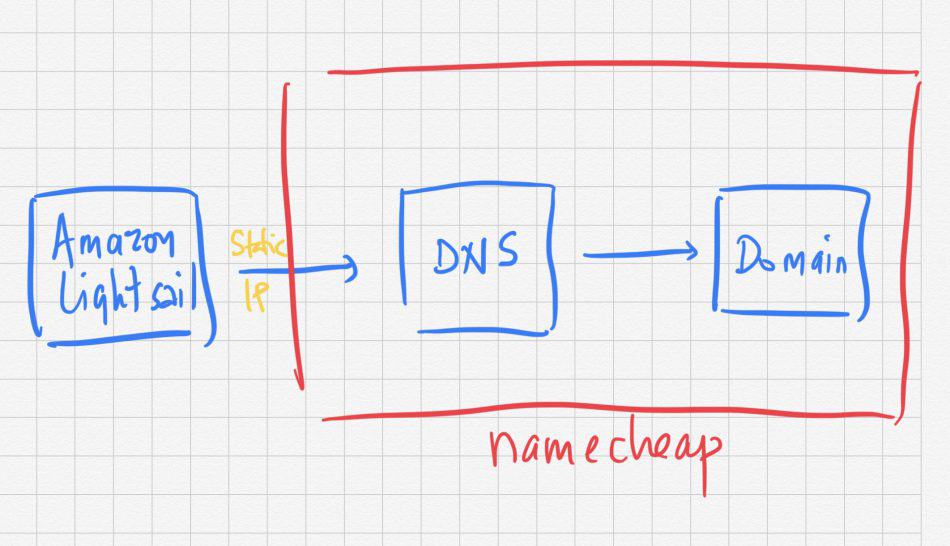
Recently I have moved one of my client’s domain from Namecheap to Amazon Route 53. The client’s WordPress site is currently hosted in Amazon Lightsail but the domain (and DNS) are in Namecheap.
A very badly drawn diagram will explain this set up of “Amazon Lightsail with Namecheap DNS and Domain Hosting”.

Steps in Amazon Route 53 to start the migration
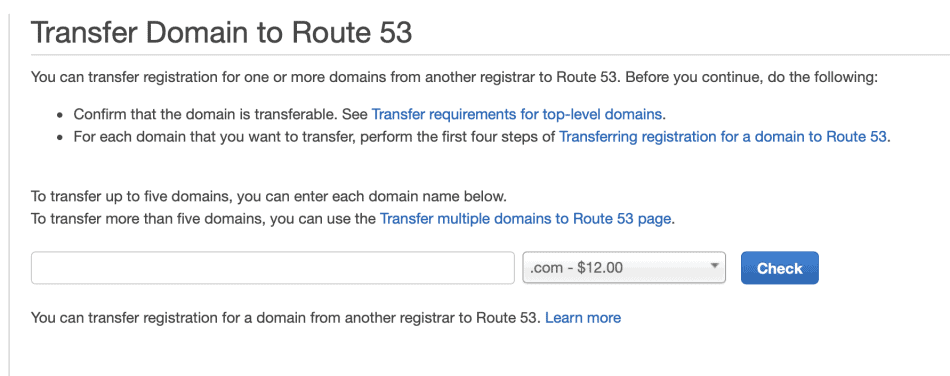
To start the migration, you go to Amazon Route 53.
Then you click on the link that say “transfer your existing domains to Route 53“. On the next screen, enter the domain you want to transfer over.

You should see this message 🙂

This is because the domain is LOCKED in Namecheap. That’s very good as it is secured for you and no one can do any unauthorised transfer of your domain.
Going over to NameCheap to Unlock Domain
You should now go over to Namecheap. You should also be securing your Namecheap account with 2 factor authentication if you have not done so.
Go to your domain. Go to “Sharing and Transfer”

Right at the bottom, you will see the “Transfer Out” section.
Unlock your Domain. Click on the “AUTH CODE” to get a code. Copy the AUTH CODE and keep it safely. You will need it later.

Copy all the DNS Settings in Namecheap
While you are here in Namecheap settings, you should copy all the DNS settings you have in Namecheap.

I suggest screen shots of all the settings AND also to copy and paste all the settings in a notepad document. You will need to copy and paste these settings to Amazon Route 53 later.
It is also important for you to copy the TYPE (e.g. TXT, CNAME, A Record etc).
My client has ZOHO mail as his email provider (as this is the only domain he has) but I do recommend you use MXRoute Email Hosting if you have more domains to manage and to have emails for.

The most important settings are the A Record (which is the static IP address of the Lightsail instance). In other words, if you go to Lightsail in Amazon, you will find a Static IP record. That’s the A Record in this Namecheap DNS setting.
My client also has a CNAME for the “www” redirection to the naked domain.
Do not forget the MX Records which tells the Domain where to get the emails from if you used the domain as your email e.g. [email protected]

You are done in Namecheap. Now go back to Amazon Route 53.
Complete the Domain Transfer from Amazon Route 53
Go back to the Amazon Route 53 and click on the link that say “transfer your existing domains to Route 53“.
With the Domain UNLOCKED in Namecheap and the corresponding AUTH CODE from Namecheap, you should now be able to proceed and go all the way to the end.
You will also be billed for the domain charges immediately 🙂
You will receive an email from Namecheap asking you to confirm that you really want to transfer the domain. You don’t have to do anything if you really want to transfer.

Note that the transfer is NOT IMMEDIATE. It takes effect quietly after about 5-7 days.
Set up your Hosted Zone settings in Amazon Route 53
In the meantime you should set up the HOSTED ZONE settings in Amazon Route 53. Think of Hosted Zone as your DNS settings for the domain hosted in Amazon Route 53.
Like this badly drawn diagram again 🙂

Go to DNS Management and choose Hosted Zones

There you should see your domain as a hosted zone or create your own.
Each of the records in Namecheap (Host Records, MX Records) is a Record Set in Amazon.
E.g.

Two record sets are created for you by Amazon (The SOA and the NS). The rest you have to copy manually from Namecheap over to Amazon.
It should be quite direct.
Save the Record Set and you are ready !!
When transfer is completed
If you done everything correctly, when the transfer of domain registration from Namecheap to Amazon is completed, it should be quite seamless. Of course if you did not do your Record Set correctly, your web site will not be found (i.e. Domain name cannot find the static IP address of the Amazon Lightsail where your web site is actually hosted). That’s where the fun starts.
If the transfer is complete, you can check at ICANN Look up page.
You should see this.

This means your domain has been moved successfully to Amazon Route 53 !!


