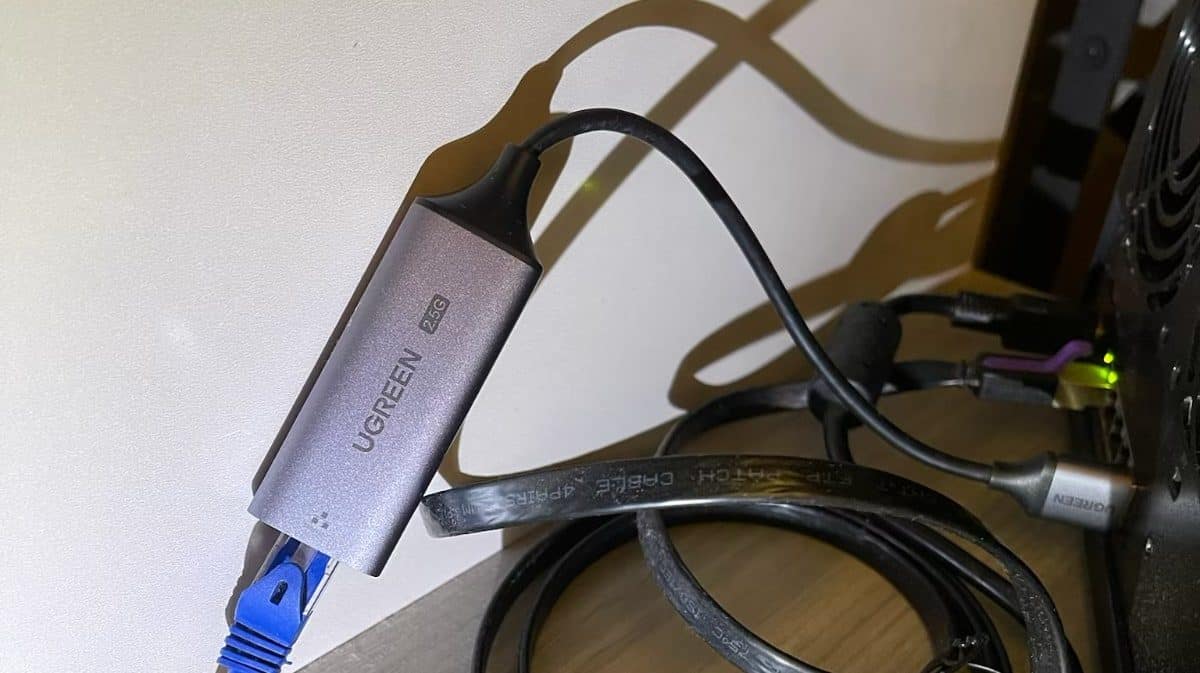
Just for fun, I have gone ahead to try to Upgrade Synology NAS with 2.5GbE network. Let’s see how I did that… This is, of course, after all the “fun” I had with my recent 2.5Gb related purchases from Ubiquiti such as the Ubiquiti 8-Port Flex 2.5G switch : Non POE Version and Ubiquiti UniFi UXG Fiber 10G Gateway and also even the cute Unifi USW-Flex-2.5G Flex Mini 5-Port Switch.
FYI that the background of my “play around” is this excellent YouTube video…
Getting the right 2.5GbE USB adapter
So I bought USB-A 2.5GbE USB adapter from Shopee and it worked. So now you know this is the right one to buy. Remember it has to be the USB-A as my Synology DS1520+ has only USB-A.

Supposedly it is because it has a Realtek RTL8150 chipset…

Upgrade Synology NAS with 2.5GbE : The Basics
The key relevant information source of this upgrade is from this Github : DSM driver for realtek RTL8152/8153/8156/8157/8159 based USB Ethernet adapters.
Step 1 : Buy the adapter you need. The Github article showed a few models but I chose the one above. It did showed the chipset so I guess I am okay 🙂

And yes, connect the 2.5GB Network Adaptor to your Synology NAS. I used the port behind.

Step 2 : Identify what CPU package architecture is your NAS from Synology web site. The link is this. For example, my DS1520+ is a Geminilake.

Step 3 : Download the drivers from https://github.com/bb-qq/r8152/releases based on your architecture and the DSM version you are using.
Since I am a good boy and always update my DSM, I am choosing the latest version.

Step 4 : Upload the driver to DSM. Go to Package Centre and then “Manual Install” and upload the driver you downloaded in Step 3.

Warning message as usual.

Make sure uncheck “Run after installation”.

You are on the right track if you have a failure ! 🙂 🙂

Step 5 : Run Terminal to SSH into the NAS
You need to now run terminal (for my Mac) to SSH into the NAS. And then run this command.
sudo install -m 4755 -o root -D /var/packages/r8152/target/r8152/spk_su /opt/sbin/spk_su
Step 6 : Go back to your DSM and run the package. This time it should work to Upgrade Synology NAS with 2.5GbE.

Like this..

Reboot the NAS
Step 7 : Verify you have a new 2.5GB connection
Now go to your network connections. You should see a new connection (after all you have connected a new network adapter via USB-A into your NAS).
For me, my original connection IP address was 192.168.0.26 and has a 1000 Mbps.
The new connection is LAN 5 which has a new nice IP address of 192.168.0.10 and shows a 2500 Mbps.

Interestingly in Unifi Controller on my UXG, my Synology server is now showing as an UGreen one… Mmm.. Maybe I should really get a new UGreen NAS 🙂

Conclusion on Upgrade Synology NAS with 2.5GbE
This was a simple upgrade of the network for my Synology to work on 2.5GbE network (which I am upgrading my home network to). But at the end of the day, you need do an end to end equipment upgrade to really able to use the true full bandwidth.
But it was fun 🙂
Will you do the same “upgrade” to your Synology NAS ?


